Part 1 Applicability:
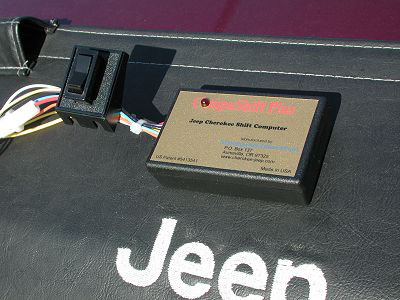
Overview: The Jeep Cherokee XJ is, with out a doubt, one of the best all around 4x4s available. (This opinion is based on the authors forty plus years of four wheeling and the ownership of 14 different 4x4 vehicles.) Unfortunately it is no longer in production. The vehicle does, however have one major fault. The automatic transmission has only one detent for both first and second gears. This means that there is no way to hold it in second gear when coming down a grade. It automatically downshifts to first when the vehicle drops below about thirty miles per hour in high range or below about ten miles per hour in low range. The CompuShift Plus has been largely marketed as a device to keep the AW4 transmission from downshifting unexpectedly while driving in slippery conditions and causing the vehicle to spin out of control. This attribute is certainly of value, however it is the author's contention that the CompuShift Plus has much more than this to offer the serious 4x4 enthusiast. Anyone who has done much four wheeling knows that second gear in low range is great for descending moderately steep trails and also for climbing hills with limited traction and speed is desired. It is very disconcerting to slow up for a water bar or other obstacle and have the transmission slam into low gear. CompuShift Plus has the magic answer! A simple toggle switch allows one to manually select and hold the transmission in second gear. It is now possible to downshift from third to second gear and slow to a complete stop with out automatically downshifting to low. You can also start in second when conditions are very slippery. The transmission shifts smoothly from low to second and back again by merely flipping the switch. It should be noted, however, that the CompuShift Plus is much more than just a switch. It is a patented device that takes over from the stock transmission control unit. It automatically switches back to the normal configuration once the shift lever is moved out of the 1/2 position. The stock transmission control unit remains intact and if a CompuShift Plus failure should occur everything reverts to the original shifting mode. Yes, it is possible to control shifting with switches, as some have advocated, but this approach has a number of problems and is not a viable solution for most users. The CompuShift Plus overcomes these problems.
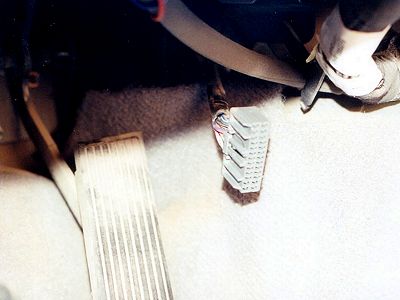
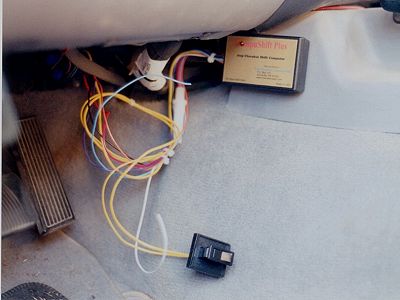
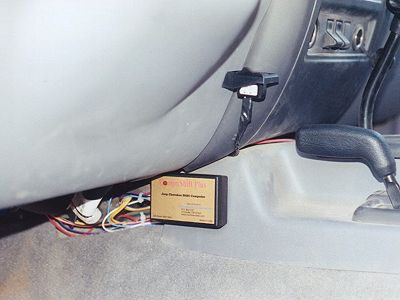
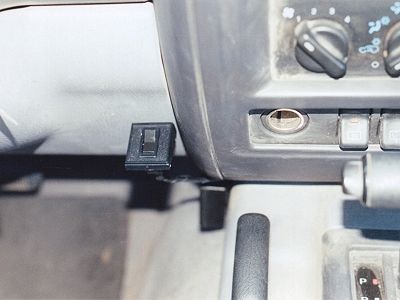
Installation: The CompuShift Plus can be installed in 15 to 30 minutes with only a screwdriver, a pair of pliers and a drill. It comes nicely packaged with everything needed except for a good way to attach the small computer box. I used some industrial-quality Velcro, although one could fasten it in place with wire ties. The computer module is nicely constructed and appears to be quite stout. It is reportedly “water-tight”. 1. The first step is to locate the transmission control module, which is found under the dash. In the 1997 Cherokee the module is located above, and to the right of, the gas pedal. (It is the authors understanding that some vehicles have it located on the passenger side.) It is now very simple to unplug the wiring harness and proceed with the installation. 2. The next step is to unwrap about four inches of tape from the wiring harness. All of the wires are color-coded and the plug is numbered so it is easy to find the proper wires. The manual has excellent instructions as to what to look for. 3. Next, after locating the correct wires, the CompuShift module is wired into the harness. This is accomplished by slipping a splicing connector over each of the seven existing wires, inserting a CompuShift wire, squeezing the connecting clip with a pair of pliers and then closing a protecting flap. This is the only tricky part as there is not much space under the steering wheel to work and the length of the wires between the firewall and the harness connector is only about six inches. Make sure to seat the CompuShift wire all the way into the splicing connector and hold it tightly in place when squeezing the connector clip, otherwise it will back out and you will only be connected to the harness wire. This could damage the harness wire and although it could be fixed, the installation process would certainly be slowed. One method to facilitate this step is to tape the wires together prior to squeezing the connector. 4. The next step is to locate a position for the switch. The writer located it on the dash, above and to the left, of the shift lever. You need to drill two holes for mounting the switch bracket. This bracket should be attached using two self-tapping screws. Some users may want to replace the switch with a higher quality switch and mounting plate. 5. The last step is to fasten the CompuShift box in place and tie up the wires with the provided wire ties. The author used industrial strength Velcro to fasten the unit under the dash as noted above (not included). After the installation is complete the unit is tested according to the simple instructions in the manual. A red indicator light will come on when the unit is activated if all of the wires have been connected properly. The final step is to road test the CompuShift Plus according to included instructions.
~ Testing: Click Here For Part 2 ~
Contact/Ordering Information:
5820 Brooklake Road P.O. Box 9031 Brooks, OR 97305 800-528-6900 http://www.cherokee-jeep.com/ jimnasset@earthkink.net Cost: $169.95-$179.95
Dirt Road Magazine is sponsored by Turner 4WD Parts Co. |